
A crown braid is one of those timeless protective hairstyles that never goes out of style. It keeps your hair off your face, looks elegant for both casual and formal occasions, and can last several days with minimal maintenance and it easily offers a polished look without requiring daily styling.
For many Black women juggling busy schedules, work, errands, and everyday life,comfort is just as important as style. Discussions across natural hair communities and protective styling forums consistently highlight the same priorities: avoiding excessive scalp tension, preserving edges, minimizing styling time, and creating versatile looks that complement natural textures. A properly installed crown braid checks all of those boxes.
In this guide, you'll learn beginner-friendly methods:
- How to create a crown braid using your natural hair
- How to make a fuller crown braid quickly with bulk braiding hair
Both methods are designed to create a beautiful style while keeping tension light and your scalp comfortable.
Why Crown Braids Are a Favorite Protective Style
Unlike many individual braid installations, a crown braid does not require constant tension on the roots.When braided with even, gentle tension, it can help:
- Keep natural hair stretched and protected
- Reduce daily manipulation
- Protect fragile edges
- Work on short to long natural hair
- Create an elegant style suitable for women of every age
- Pair beautifully with textured, gray, or color-treated hair
If your hair is shorter, finer, or you simply want a fuller look, using bulk human braiding hair makes the style easier, creates a fuller and more natural-looking crown, and helps reduce tension and scalp irritation.
How to Crown Braid Your Natural Hair
Gather things before you begin:
- Rat-tail comb
- Edge brush(optional)
- Hair clips
- Small elastics
- Bobby pins
- Moisturizing leave-in conditioner
- Edge control (optional)
Start with clean, detangled, lightly stretched hair. Blow-drying on low heat or stretching overnight makes braiding much easier.
Classic Deep Side Crown Braid

This version creates a soft side-parted crown that frames the face beautifully and works especially well on thick natural hair.
Step 1: Create a Deep Side Part
Create a deep side part on one side of your head, starting near your front hairline.
Step 2: Begin Dutch Braiding
Starting near the larger side of the part, begin a Dutch braid by crossing each section underneath instead of over.
As you braid, gradually add natural hair strands from inner side while following the hairline around your head.
Step 3: Continue Around the Head
Maintain consistent but gentle tension.Avoid pulling tightly around the temples and edges.
Follow the natural perimeter until you reach the opposite side.
Step 4: Finish the Braid
Continue braiding the remaining length normally.
Secure the end with a small elastic.
Step 5: Hide the Tail
Wrap the braid underneath the beginning of the crown.
Secure discreetly using several bobby pins.
Step 6: Finish the Style
Lightly fluff the braid crown for a fuller appearance.
Smooth baby hairs if desired and apply a light shine spray.
Quick Two-Braid Crown

If braiding all the way around your head feels difficult, this beginner-friendly method is much easier.
Step 1: Divide the Hair
Part your hair into two equal sections in the middle from front to back.
Clip one side away.
Step 2: Create the First Dutch Braid
Starting at the nape, Dutch braid upward along the perimeter toward the front.
Secure the end with a small elastic.
Clip the braid aside.
Step 3: Create the Second Dutch Braid
Taking to dutch braid the remaining section hair, begin at the front and braid downward along the opposite side toward the back.
Secure the hair end with another elastic.
Step 4: Join Both Braids
When the two Dutch braids meet near one ear, tuck the end of the upward braid underneath the downward braid.
Secure the overlap with two or three bobby pins.
Step 5: Complete the Crown
Lay the second braid inside the first braid around your head.
Hide the remaining tail beneath the braid near the ear.
Use several bobby pins to secure everything in place.
Step 6: Add the Finishing Touches
Gently loosen sections for a softer appearance.
Smooth flyaways with a small amount of styling cream if needed.
Why beginners love this method:
- Easier than braiding continuously around the head
- Less arm fatigue
- More forgiving if you're still learning Dutch braids
- Creates a balanced, symmetrical crown
How to Quickly Create a Fuller Crown Braid with Bulk Human Braiding Hair

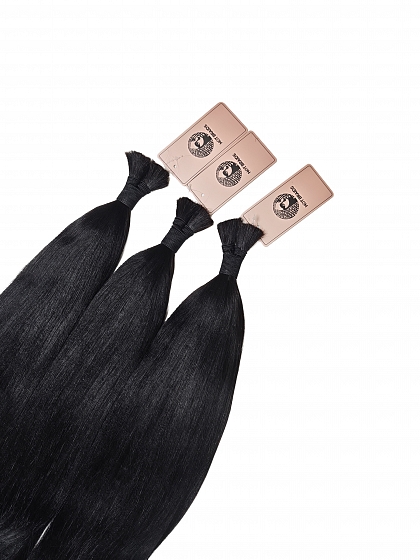
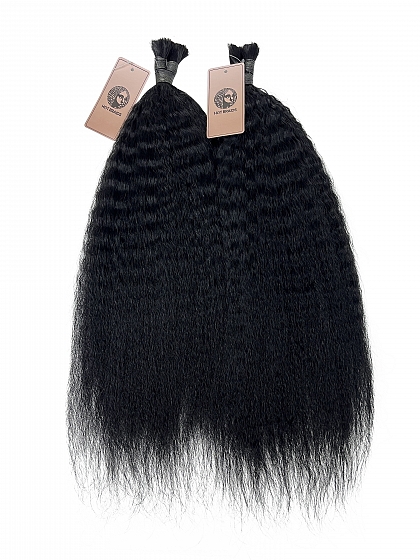
If your natural hair is shorter, thinner, or you simply love a fuller crown, pre-braiding bulk human braiding hair is one of the easiest shortcuts.
Because the braid is plaited separately before being attached, you avoid repeatedly pulling on your natural hair. This method also creates a fuller, more polished finish in less time.
Things You'll Need
- Bulk human braiding hair
- String
- Chair or hanger
- Small elastics
- U-shaped hair pins
- Bobby pins
- Hair tie
- Edge control (optional)
Choose braiding hair that's long enough to wrap comfortably around your entire head with a little extra length for securing the ends.
Step 1: Put Your Natural Hair Into a Low Ponytail
Brush and tie your hair smoothly into a neat low ponytail.
Avoid making the ponytail too tight since it will support the braid.
Step 2: Prepare the Braiding Hair
Fold the bulk hair in half.
Secure the center with an elastic.
Loop the elastic over a string, then hang it from a chair, hanger, or door hook to keep the hair steady while braiding.
Step 3: Braid the Bulk Hair Extension
Separate the hanging braiding hair into three even sections.
Create a regular three-strand braid while maintaining consistent tension.
Continue braiding until you reach the desired length.
Secure the end with another elastic.
Step 4: Remove the Support String
Cut or untie the string carefully.
Your completed braid is now ready to use as a crown.
Step 5: Attach the Crown Braid
Position the center of the braid at the base of your low ponytail.
Secure it with several bobby pins.
Wrap each side of the braid around your head, following the natural hairline.
Step 6: Pin Everything Securely
Hide the braid ends underneath the opposite side.
Use U-shaped pins throughout the crown for a secure but comfortable hold.
Adjust the braid slightly until it sits evenly around your head.
Finish by blending your natural hair around the hairline if necessary.
Tips for a Comfortable, Long-Lasting Crown Braid
A crown braid should feel secure—not painful. If your scalp feels sore immediately after styling, it's usually a sign that the braid is too tight.
To keep your style comfortable and looking fresh:
- Moisturize your hair before braiding.
- Keep even, gentle tension throughout the braid.
- Never pull tightly around your edges.
- Sleep with a satin bonnet or silk scarf.
- Refresh your scalp every few days with a lightweight moisturizing spray.
- Remove the style if you experience persistent discomfort.


 Lost in-transit